Benefits of Garden Bed, Border, and Lawn Edging
1. Visual Appeal:
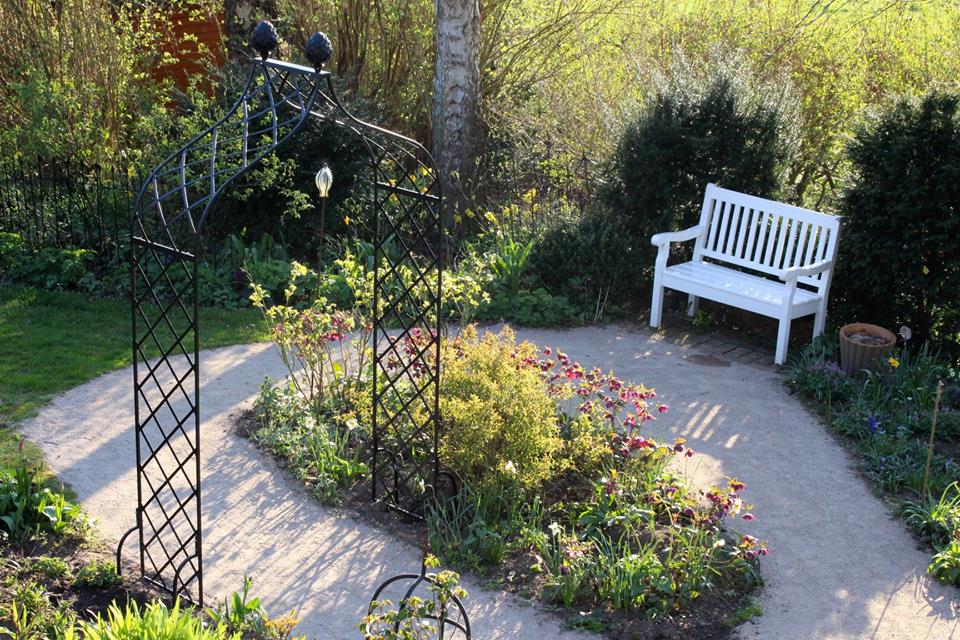
- Edging creates clear boundaries between different areas in your garden, defining spaces and enhancing the overall visual appeal.
- It adds a finishing touch, giving your garden a well-groomed and perfected appearance.
2. Barrier Function:
- Edging acts as a physical barrier, preventing grass, weeds, or aggressive plants from encroaching into garden beds or lawns.
- This is especially important when growing groundcover plants that might spread into unwanted areas. Even with plants like English Ivy that could "hop over," having an unrooted area to cut will make it easier to remove should it escape.
3. Reduced Maintenance:
- With less undesirable plant growth, maintenance efforts are reduced so you can spend your time enjoying your garden instead of weeding.
- Edging with a spade looks attractive but is time-consuming and requires constant upkeep in areas with frequent heavy rains.
4. Soil and Mulch Retention:
- Edging helps retain soil and mulch within garden beds, preventing erosion caused by weather or watering.
- Ensuring mulch, other applied organic matter, and granular fertilizers stay where they belong provides a stable growing environment for your plantings.
5. Easier and Safer Mowing:
- Protective barriers keep stone and large nugget mulches where they belong—no pre-mowing cleanup and no dangerous particles flying around, potentially damaging mower blades, trimmers, or even yourself.

Material Options for Edging
1. Plastic Edging:
- Pros:
· Affordable
· Lightweight and easy to handle
· Flexible, allowing for curved designs
· Resistant to rust and corrosion
· Good for areas that children frequent due to the softer profile and gentler material
- Cons:
· Lesser quality products may degrade or discolor over time due to exposure to weather and sunlight
· Lesser quality products may be less durable than other materials, especially in high-traffic areas
- For Best Results:
· Both of the “cons” may be solved by purchasing a product made of high-quality material, such as our Super-Edg. Super-Edg is backed by a 20-year manufacturer's warranty against degradation from any weather conditions or manufacturing defects. Super-Edg is made from strong yet flexible high-grade PVC with absolutely no fillers. Fillers, or chemical foaming agents, are less costly elements often added during the manufacturing process which impart a hollow cellular structure to the final product. This weakens the product, rendering it more likely to break down with exposure to weather and sunlight. These lesser quality edgings may look bulky but will weigh little—a telltale sign of inferior materials.
2. Steel Edging:
- Pros:
· Extremely durable and long-lasting
· Provides a sleek and modern appearance
· Stays in place even in harsh weather conditions
· Sturdiness ideal for high-traffic areas
- Cons:
· Generally more expensive than plastic
· Heavier and can be more challenging to install
· Sharp edges may not be safe for children and pets
· Less flexible than plastic so may not work with sharp angles
· Susceptible to rust if not properly coated by manufacturer or maintained
- For Best Results:
· Choose a galvanized and powder coated steel edging, such as our Classic EverEdge. EverEdge is estimated to last at least 15 years without rust or deterioration. It is installed in interlocking and overlapping sections that are easy to handle, requiring only a heavy mallet. Pieces can be cut to length with a hacksaw, and bent over a straight edge to accommodate sharp angles. The protective and attractive brown powder coating makes it virtually invisible and also softens the edges, making it safe for kids, pets, and your mower tires. The three different heights can be used together for a level edging on sloping or uneven ground.
3. Paver or Brick Edging:
- Pros:
· Versatile and available in various styles and colors
· Durable and long-lasting
· Can be used for both straight and curved designs
- Cons:
· Requires more effort to install compared to flexible materials
· May be more susceptible to frost heave and movement over time unless professionally installed
· Heavy, making handling and transport challenging
· With time enough soil may collect between pavers to allow weeds to grow within the edging
- For Best Results:
· Use a manufactured edging specifically made for pavers that enables secure installation
· If hand-setting pavers directly in the soil on small jobs, to minimize movement choose one that can be buried at least 4 inches below grade, compact soil in trench beneath, tamp in firmly with a rubber mallet and backfill tightly
4. Wood Ties or Lumber Edging:
- Pros:
· Natural and blends well with many garden styles
· Easy to install and can be customized with a simple handsaw
· Budget-friendly option
· Landscape ties or lumber may be used
- Cons:
· Prone to rot and decay over time; splitting and splintering may render it unsafe for children and pets
· Attracts insects and pests
· May warp or shift due to weather conditions
· Pressure treated lumber, especially if made before 2003 may leach chemicals into the soil
· Can’t accommodate curves
For Best Results:
· Cypress wood is preferable as it resists decay; will fade to gray with time
· Treat wood with a protective sealer and reapply every few years. Use only food safe products for edible gardens
· Round sharp edges and corners of lumber if using near play areas
· Never use old railroad ties for edible gardens due to leaching of chemicals--this also applies for recycling garden ties of unknown provenance
5. Natural Rock Edging:
- Pros:
· Adds a rustic and natural look to the garden
· Durable and long-lasting
- Cons:
· Heavy and labor-intensive to install
· Limited flexibility for curved designs
· Difficult to get a tight fit between stones and heights will be uneven which may allow some soil or mulch to overflow
- For Best Results:
· Look for stones that have similar heights and proportions
· Lay out stones to find matching edges before setting stones permanently in place—this will be a bit of a jigsaw puzzle
 Super Edg PVC Edging cleanly and virtually invisibly separates garden areas
 EverEdge Classic Steel edging creates an incredibly precise border
 Scalloped concrete edging doesn't install deeply enough and does not remain straight
 Wood edging is prone to cracking & splintering and will degrade and discolor
- No edging at all results in an unkempt look which also makes mowing difficult
Installation of Garden Edging
1. Preparation:
· Mark the Area: Use garden stakes and string to outline the edges of garden beds or lawns
· Clear Debris: Remove grass, weeds, and debris from the marked area. Larger areas of grass can be removed by cutting sections on all 4 sides and slicing 1-2 inches deep underneath with a flat spade--this works very well if you wish to reestablish the turf elsewhere
· Dig a Trench: Dig a trench along the marked lines, ensuring the depth accommodates the chosen edging material. Wooden ties and rocks will not need a trench
2. Plastic Edging Installation:
· Place Edging: Insert plastic edging into the trench, adjusting its height as needed
· Secure Edging: Use stakes to secure the edging, ensuring it aligns with the marked line--this will prevent frost heave and excessive movement
· Backfill: Fill the trench with soil, compacting it around the edging
3. Steel Edging Installation:
· Position Edging: Place steel edging in the trench, ensuring it is level and straight. If your ground is sloping or otherwise uneven, you can use EverEdge in different heights as they will work together.
· If your ground is very soft you may wish to place pieces of flat tile or brick underneath the edging, especially under joints, to reduce sinking.
· Secure Edging: Use stakes or anchoring systems to secure the steel edging in place.
· Backfill: Fill the trench with soil, compacting it for stability.
4. Paver or Brick Edging Installation:
· Lay Pavers: Tamp any loose soil underneath to prevent sinking and be sure your trench is level—you may need to do this as go you to ensure that all pavers sit at the same height. You may wish to use a layer of stone dust at the bottom for an extra secure installation—just dig the trench that much deeper to accommodate. Set tightly against the front of the trench. Pavers or bricks can be laid on sides or end for a higher edging but can also be laid flat to simply keep a separation between lawn and garden bed. Laying them flat and setting rectangular pavers perpendicular to the garden edge and slightly below lawn level will provide an attractive strip that allows for easy mowing.
· Backfill: Fill trench behind pavers with soil or gravel after laying each 6- to 12-inch section, depending on the width of your pavers. Compact backfill soil for secure placement.
5. Wood Edging Installation:
· Place Edging: Wooden landscape ties do not need a trench. However, if you are trying to keep aggressive plants from invading a bed you will need to install heavy duty landscape fabric vertically from the inside top at least 4 inches below the edging and preferably in an L-fashion with 4 inches laying flat on the side toward you. The fabric can be stapled in place on the inside of the ties.
· Drill Holes: Drill holes through the landscape ties to accommodate rebar or metal stakes. If your ground is very hard you may need to drill corresponding holes in the ground. Rebar should be long enough to be placed at least 4 inches into the ground.
· Secure Edging: Place rebar or metal stakes through holes in ties to secure ties to ground. If you have not pre-drilled ground holes you will need a heavy mallet to insert, or you can use a piece of wood placed over the end of the rebar and pound in with a hammer.
· Apply Sealant: You should apply a wood sealant to protect against rot and decay but be sure it is food safe if you are growing edibles. A penetrating oil is recommended, such as linseed oil. An application of carnauba or beeswax can also be used. There are many commercially available products for this purpose, just be sure they say they are food-safe. They will need to be reapplied after a period of time.
6. Natural Rock Edging Installation:
· Position Rocks: No trenching needed, but depending on the height of each rock you may need to dig deeper to place some of them. Try all angles to get the best fit you can--some can be set on edge if necessary.
· Backfill: Fill behind the rocks as needed
Garden Edging: Getting Creative
 Spiral knot garden designed in lawn with EverEdge
 Vegetable garden with pea gravel paths created with EverEdge
 Intricate scroll of plants in gravel bed created with SuperEdg
 'Stained Glass' knot garden--different colors of glass defined with SuperEdg
 'Trivial Pursuit' edible garden with gravel pathways built with EverEdge
Garden bed edging and lawn edging are versatile tools that not only enhance the beauty of your outdoor space but also contribute to its overall health. Choosing the right material and following proper installation techniques will ensure a long-lasting and visually pleasing garden. Consider your specific needs, style preferences, and maintenance capabilities when selecting the most suitable edging material for your garden, and remember that quality materials will give the best and longest lasting results. Create something you'll still be proud to show off for years to come!
You may also like