Growing plants indoors is a simple and enjoyable way to experience the psychological benefits of gardening all through the year. Such an organic presence is not only beneficial to our state of mind, it's also an important element of interior design. A well-grown indoor plant in a complementary pot enlivens our decor and enriches our well-being. Of course, an unhappy plant can be a source of concern and frustration, so it's vital to understand what our plants need and how to create a growing environment that will keep them in tip-top shape. We've created a list of tips to help you determine the proper placement and care of your indoor plants.

Watering
More houseplants die from overwatering than anything else. Most houseplants like to dry out between waterings. Some can dry out a lot (snake plants) some moderately (pothos, philodendron, dracaena canes), and some just a little (peace lily). So how do you know when that is achieved? There are several ways you can gauge this, and it’s best to combine all the methods until you have a good schedule established:
- Take note of how heavy the pot feels once watered completely (water just begins to come out of the holes in the bottom). It should feel significantly lighter when dry, and somewhere in between for moderate drying. Check it every day fora new plant or newly potted plant.
- Water the plant completely and measure the time until you see it just barely wilt. Note that this is not effective for plants with very thick leaves like snake plants and rubber plants. For some thicker leaved plants you will see that the leaves hang lower on the plant, but the individual leaf doesn’t appear wilted. Water it completely, and next time water 1 to 2 days before your established “wilting” point.
- If the water runs through the drainage hole almost immediately it's likely that it's going around the soil instead of through it. Potting mix can easily dry so much that it pulls away from the sides of the pot, with water running off as if it were a dry sponge. Unless your plant is a cactus you probably already know you have a problem. You'll need to really soak the mix until it can absorb water again, sometimes even placing it in a bucket of water.
- You can use a chopstick or unfinished wooden dowel to check the moisture level. Place the stick all the way down in the pot and wait a few seconds. When you pull it out, you should see the moisture line, like an oil dipstick. Plants that want to dry out a lot will want this level very low, those that prefer drying moderately in the middle, and those that should only dry slightly about ½ to 1 inch down for a 6 to 8 inch pot.
- If you’re not sure it’s time to water, wait a day and check again.
- Few large houseplants will need watering more than once a week. 6 inch pots may need it twice a week, depending on the species, root system development, lighting, and room temperature.
- Water sitting in saucers or cache pots should be drained after no more than 10 to 15 minutes. And you will NEED a saucer because your pot should have a drainage hole or your plant's roots will suffocate and drown. If you are a more experienced indoor gardener you may be able to maintain a plant in a pot without drainage, but it requires adequate knowledge and very precise applications.
- CUT BACK ON WATERING IN WINTER. This is a resting time for most houseplants, and you’ll find that you may need to water only half as much.
- Plants in low light will need significantly less water than plants in bright light. With less light, they’re not growing much so can be easily overwatered. Imagine them as couch potatoes--they’re not expending much energy, so they need to cut back on the food and drink!
- If after a long period you find that your plant is needing water more frequently, this may be a sign that the roots have filled the pot and it needs more room. Some plants, such as peace lilies and amaryllis, actually prefer to be somewhat rootbound and may not bloom as well otherwise.
- In general, plants with thinner, softer leaves will need more frequent watering than those with thick, stiff leaves.
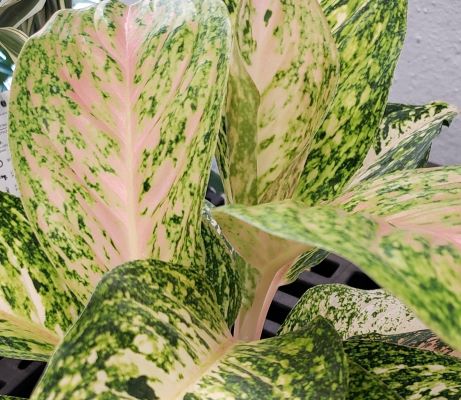
- Plants with more variegation or colored leaves usually have less chlorophyll, so they will need more light than their green counterparts, otherwise, variegation or color may be reduced.
- Some plants are very sensitive to chemicals added to city water or via water-softening. For instance, dracaenas, peace lilies, calatheas, cordylines and spider plants may exhibit tip-burn as a symptom of fluoride toxicity. If this should be a problem use rain water or distilled water instead.

Light
- Most houseplants will burn in direct sunlight, as in their native haunts they are understory plants. Some plants than can take full sun are often commercially grown in shade so that they are pre-acclimated to live indoors--large ferns, crotons, and some palm varieties for example. On the flip side, some growers cultivate the traditionally low-light snake plants outside in full sun, so you never know for sure. As a guide, if your plant was already outside & not under cover when purchased, then as long as the foliage looks clean and healthy it should be safe to go in the sun. Plants should be gently acclimated over 1 to 2 weeks if their lighting is to be changed.
- Bright indirect light is direct sun through sheer curtains or within an arc one to two feet in front of a brightly lit window. Light does not travel sideways, so light is lower the same distance to the sides of a window compared to in front.
- Brightest light is an unobstructed south window, followed by east, west, and then north having the lowest light. As the angle of the sun changes throughout the year, you may need to adjust the location so that direct sun doesn’t burn the leaves. Angled sun later in winter is usually less hot so it may not be a problem.
- Remember to regularly rotate the plant for even growth--most plants orient their leaves toward the light and new growth will be on the brightest lit side.
- Bright fluorescent light is usually plenty for most low and medium light plants--a mix of cool white and warm white is even better.
- Anything farther than about 10-15 feet from a window without supplemental lighting may be ill-suited for many plants for any length of time, but there are some very life-like imitations available. Much will depend on the color of the walls and furnishings, as lighter colors will reflect light but dark colors will absorb it. Alternatively you can rotate plants every couple of weeks back and forth from an appropriately lit area to the darker spot.
Temperature
- Most houseplants prefer temperatures between 55 and 85 degrees--they are tropical, after all!
- Best growth is usually acheived between 65 and 78 degrees for most house plants.
- Temperatures below 55 degrees for any amount of time, or even a quick cold draft, may be enough to damage sensitive foliage. This may take up to 10 days to manifest, and will often be seen as brown spots with a water-soaked or greasy appearance, or a sudden seemingly inexplicable dieback.
- Some plants benefit from a 10 degree drop in night temperatures--many bromeliads, for instance. For others this may encourage blooming.
Humidity
- As most houseplants other than succulents hail from tropical regions, they will fare best with humidity levels exceeding that of the average home in winter, 60 to 80 percent and 20 to 40 percent respectively. If the air becomes drier than the plant can tolerate you may see brown tips and edges forming.
- Grouping plants together will increase humidity, but be sure there are no insects as they can spread rapidly from plant to plant indoors.
- Placing pots, individually or grouped, on a saucer filled with pea pebbles and water will increase humidity as the water evaporates. Note that the plants should be sitting ON the pebbles, not IN the water, so be sure the level of the pebbles is high enough. Keep the water topped up as necessary.
- Place the plant pot inside a larger pot filled with wet sphagnum moss. Keep the moss moist, but do not allow water to build up at the bottom. As the moisture evaporates it will increase the humidity around the plant. Be sure to keep the moss away from the plant stems.
Potting and Soil Mix
- Use a potting mix specifically for container plants, not garden soil or topsoil. Try to use something as similar to the mix in which it was grown as possible. Our coco fiber is an excellent potting medium for houseplants, either alone or as a component.
- Containers MUST have holes for drainage, unless it is an aquatic plant.
- Never go up too big when repotting. Doing so leaves too much soil where no roots exist, so the water will never be taken up properly and the plant will rot.
- Usually one inch larger than the old pot is the rule. If you don’t want to keep buying new fancy pots, pot in a nursery pot and place inside the fancy pot. If you don’t want to see the nursery pot inside, cover the inside top with preserved sphagnum or Spanish moss, but don’t let it touch the stems.
- When you get a new plant, it’s always a good idea to pop the pot off and take a look at the root system. If the roots are small (or heaven forbid brown, mushy and water-soaked), and you have a lot of loose dirt at the bottom or sides, take extra care with watering. If it’s really bad, consider repotting into a smaller pot more suited to the size of the root ball. This may happen when growers “up-can” once the top growth is large, but push it out the door before the root system has a chance to catch up. Not a good practice, but it happens more than you’d think. I always check the roots before I buy ANY plant. If the store objects, then you might want to reconsider shopping there.
- Repot at the beginning of the growing season when roots will be actively growing, usually spring or early summer. That will prevent the root ball sitting in a sheath of empty soil for too long, again preventing root rot.


