With a small garden it’s always hard to decide what plants will make the cut. Originally, I chose perennials and a few smaller shrubs to create a happy bird habitat to complement my various feeders. I must admit, though, that over time I’ve become a bit more selfish and have focused on growing as many edibles as possible in my tiny homestead. Of course, the various berry bushes I've planted do benefit the birds, but my snacking, not theirs, was the priority. At least I don't net the plants, so my little feathered visitors have a fair chance.
One of the most exciting additions has been the 8-foot arch that frames the sliding glass door, which provided the perfect opportunity to add another edible to my line-up: grapes. Truthfully, I did this as a lark, finding the vine for 50% off at one of those big box stores. I never really imagined it would work—it seemed like something too difficult to grow. But I must tell you, I was wrong! It was amazingly easy, and incredibly fun and satisfying.
If you’ve thought about creating a leafy green, shaded retreat in your landscape, then a grape arbor is just the thing. The vines are fast-growing, the foliage is attractive, and the maintenance is relatively simple. You can grow several along each side of a pergola, or just one vine on an arch if you don’t have room for more. Either way, when you eat that first fresh, home-grown grape you’ll want a whole vineyard!
Here’s how to get started:

Growing Grapes in Your Garden is Easier Than You Think!
Growing Grapes: Choosing Variety, Siting, and Planting
Choose the Right Grape Variety
Selecting the appropriate grape variety is crucial for successful cultivation. Choose varieties that are well-suited to your climate and desired use (eating fresh, making wine, or drying).For home growers, consider these popular choices:
- Concord: Known for its robust flavor, Concord grapes are excellent for fresh eating and juicing. Concord is a cultivar developed from our native Vitis labrusca, or fox grape.
- Thompson Seedless: A versatile variety used for table grapes, raisins, and wine production.
- Chardonnay or Cabernet Sauvignon: Ideal for wine enthusiasts who
want to try their hand at home winemaking.
I'm in zone 7, and chose a Concord variety, as they handle hot, humid summers well and ripen several weeks earlier than others, starting in mid to late August.
Site Properly
Most grape varieties prefer temperate climates with warm summers and mild winters. Ensure your chosen variety is suitable for your USDA hardiness zone. Grapes generally need a frost-free period of 150-180 days for fruit ripening.
Grapes require full sun for optimal growth and fruit production. Choose a location for your arbor that receives at least 6-8 hours of direct sunlight daily.
Grapes thrive in well-drained soil with good fertility. If necessary, before planting amend the soil with compost or well-rotted manure to improve its nutrient content and drainage. Aim for a slightly acidic to neutral pH level (pH 6.0-7.5).
Grapes prefer their roots warm and don't want root competition, so don't mulch heavily or use a groundcover around them.
My soil is rather poor and sandy, and to be honest I didn't do much other than adding some composted leaves and root starting fertilizer to the backfill soil. Planting site was south-southwest facing, blocked in the morning by another unit, and a large silver maple in the common area partially shades it for a few hours in the afternoon. I'd be surprised if it gets any more than 6 hours of sun.

Planting Your Grapevine
- Space grapevines 6-10 feet apart along the arbor or pergola. Dig holes deep and wide enough to accommodate the root system without crowding.
Since I was planting on an 8' wide arch, I planted only one, on the left side. At the same time I planted a native honeysuckle vine on the right side, and they have coexisted peacefully. I do prune the very long grapevine shoots back in the summer so it doesn't cover up the honeysuckle.
I could have planted another grape on the other side and it probably would have worked out fine, except the hummingbirds would miss the honeysuckle! I never "attached" the grapevine, but just wove it through the lattice in a few places as it grew taller.
Growing Grapes: Watering & Fertilizing, Pruning & Training, Maintenance, & Harvesting
Grapevine Care: Watering and Fertilizing
- Grapes require regular watering, especially during dry spells and when fruit is forming.
- Avoid overwatering to prevent root rot.
- Apply a balanced slow-release fertilizer in early spring, according to package instructions.
- Avoid excessive nitrogen, which can promote foliage growth at the expense of fruit production.
I don't recall paying much attention to watering in the first couple of years. I watered whenever I needed to water the rest of the garden, so roughly every week during the hot summer. The vine is planted under an overhang, so compared to the rest of the yard it gets less water when it rains. Other than the starter fertilizer, I only made a very occasional application of AlgoFlash all purpose liquid during the first couple of years.
Grapevine Pruning and Training
- Prune established grapevines during the dormant season (late winter or early spring) to promote air circulation, reduce disease risk, and improve fruit quality. Prune away old wood and retain strong canes for the next season. Delay until danger of hard frost has passed if you are prone to late frosts in your area. Pruning prompts tender new growth which can be damaged by a late frost so timing is important.
- Grapes fruit on the new growth arising from one year old canes. Pruning is aimed at removing non-productive older wood and also thinning the canopy to direct the plant's energy toward fruiting.
- There are several different systems for pruning and training, but cane pruning is usually the best for an arbor or pergola. Some varieties may produce better with a spur-pruned cordon system, but that is not recommended for Concord and other similar types.
- For new plantings in spring, prune away all but the strongest shoot, and prune that one back to 3 buds.
- When new growth is about 8-12 inches long, remove all but the strongest, most upright shoot and tie that into your frame; also remove any shoots coming from below ground level.. This is what will become the permanent trunk of your vine.
- Hopefully that trunk will have grown to about 30 inches in height by late winter/early spring. If not, you should repeat the pruning as per the previous year so as to ensure the growth of a good, solid trunk. When growing on a pergola you will want to create a longer trunk, with the head of your vine to closer to the top of the pergola.
- By the second dormant season your trunk should be formed, so you would choose 2 canes to keep for the upcoming season. They should be light brown and about as thick as your little finger. Tie these in to your arch rails and cut to about 2-3 feet long. Choose another 2 canes as renewal canes for the following season and cut these down to only 2 buds. Remove all other growth.
- Each year you will repeat the process, removing last year's canes, tying in new, and creating renewal canes. With cane pruning all your cutting will be done near the head of the vine, which means you don't need a ladder to get to the growth on top the pergola--you can just pull it down after it's been cut.
- If you've seen pergolas with neat rows of grapes all the way across each rail that involves a different pruning method creating permanent cordons across the top and then spur pruning the cordons. Obviously that is a bit more involved and you will need a ladder, but still is not that difficult. You could also create a permanent cordon across an arch and spur prune that if you choose.
- The type of grape you have will partially determine your pruning method. American grapes like Concord, Niagara, Catawba, etc., are typically cane-purned as they fruit farther down the cane, with the the first few buds tending to be non-productive.
This is the essential, and perhaps most daunting, element of growing a grapevine for fruit production. The better you prune, the better your crop. I didn't prune much for the first couple of years as the plant was getting taller, but the plant would have developed a better trunk if I had. Dormant pruning involves removing about 90% of the growth, so you must be brave! The vines grow very quickly, so don't be concerned that you'll entirely lose your shady oasis. In fact, you may want to prune again in summer if the new growth is extensive. I end up cutting back another 3 to 4 feet of growth on some non-fruiting shoots in summer--they really can grow that fast. If the foliage on the fruiting canes is too heavily shaded it reduces photosynthesis which affects ripening. Thinning the canopy by removing shoots with no fruit clusters may be necessary if your vines are very vigorous, but be sure not to prune back too hard the canes you'll need for next year.
Maintaining Your Grapevine
- Monitor vines for pests such as aphids and diseases like downy and powdery mildew.
- Plants can often live with a small insect population without harm. A strong spray of water can often knock them off. Use organic pesticides if absolutely necessary.
- Overuse of nitrogen fertilizer can prompt excessive new growth that is most attractive to pests.
- Remove any diseased leaves promptly and discard in trash--do not compost. Clear and discard any infected foliage that may have fallen on the ground below.
- Keeping watering consistent and avoiding wetting foliage late in the day can help to prevent fungal disease. If foliage is very heavy a moderate summer pruning of new growth can improve air circulation.
Had a tiny bit of mildew in the second year, probably drought related, but nothing serious. Looking back at my pictures, there may also have been some downy mildew in the third year, but it didn't seem to cause any trouble. I will have to watch for that this year. No pests that I've seen so far.
Harvesting your Home-Grown Grapes!
- Grapes are typically ready for harvest in late summer to early fall, depending on the variety.
- Grapes should be plump, firm, and easily come off the vine when gently pulled.
- Harvest clusters carefully to avoid damaging the fruit. Use sharp scissors or pruning shears to cut grape clusters from the vine.
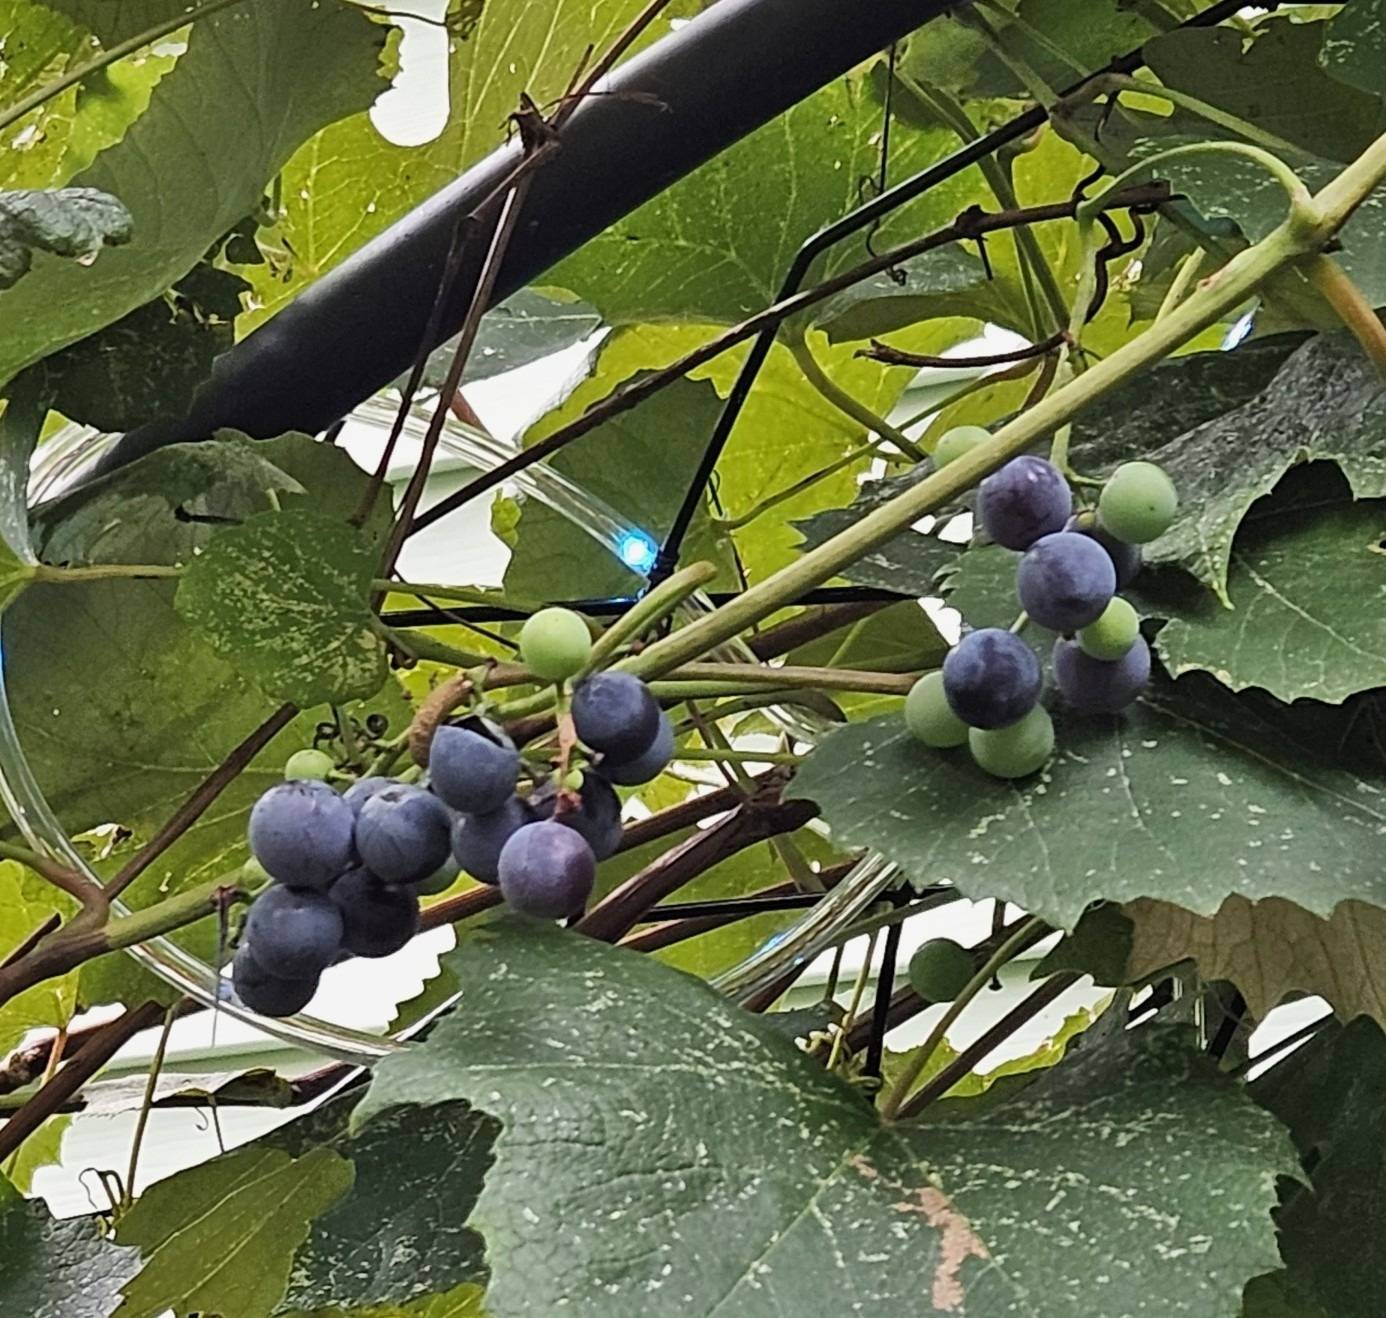
First fruiting for me was in the third year. It was exciting to see it bloom for the first time! There were perhaps 10 clusters, with 6-15 grapes per cluster. Each fruit was about the size of a nickel, and they didn't all ripen at the same rate within the cluster. Perhaps they would have caught up with each other if various family members (including me) hadn't been so anxious?
The most fascinating thing was how the taste changed as they ripened. The longer we left them the sweeter they became, but also a bit more bland. The skins seemed to thicken a bit as well. Once they started to ripen I think it was about 3 weeks or so that we were tasting at various times. This year we have more clusters with more grapes, and as I'm watering more regularly they will hopefully be larger.
Update 2025 - Grape Vine Year 5
I really tried to pay better attention to my pruning for this year, and I must have done a good job. Harvest this year is phenonmenal, with too many clusters to count. Grapes are still about nickel size, but clusters are fuller. Picked a bowl full the last week of August since there were so many. I like to leave some for the birds--they tend to eat them later when they've shrivelled up a bit - I don't see any missing that are not the result of human snackers so far! Did very little, if any, supplemental watering this year, but it rained fairly regularly with no prolonged drought. Broadcast some comfrey pellets and slow-release organic granular fertilizer over the whole garden in spring, but nothing further. Seeing white stippling on leaves as in previous years - this is likely leafhopper damage. As I didn't notice them the populations must not be too high, and as long as the plant tolerates them I will leave them alone. I might try to spray the foliage off with water periodically next year to see if that helps. In a year where the cucumbers pooped out early (I knew I needed to rotate, but didn't), the squash all succumbed to borers (nothing new) and I never even got to plant the pepper seedlings (time flies) it was nice to succeed at something! If you had told me 10 years ago it would be grapes I would have l laughed in your face. So, when I say you can do it too, believe me!!


